Thursday 29 December 2011

Contact printing frame

I was lucky enough to have a simple timber 5x4" contact printing frame made for me for Christmas and the experiments so far show that a contact prints detail is far superior - to my eyes - than a scanned image.


Although I am using Ilford Multigrade IV paper I am not for the early experiments using and filters to contrast correct and there is some detail in the sky as the yellow filter and neutral density filters were both used.


Both photos are as they were developed no adjustment after scanning .. so you can see the out of line horizon etc .


I hope you had a good Christmas ..

Friday 23 December 2011

I think this is how vignetting happens

The diagram above indicates the dimensions of a 5" x 4" paper negative as used in my pinhole cameras. I have been trying to fully understand why there is darkening at the corners and how to reduce that to a minimum without having to loose too much of the great wide-angle ability of pin hole cameras.
The triangle on the left show the dimensions as if on the centre line across the negative whilst that on the right indicate the dimensions as if on the diagonal across the negative.


You can see the circle in the centre indicating that only the very corners may show any vignetting .

The difference in lumination, I am using the cos power3 here not cos power4  left ..70%   that on the right 59%  so you can see there is a drop off just at that outside the circle part ... which also reflects the  difference in f number 284 (125/ 0.44) on centre point 318 (140/ 0.44) on outside edge of the centre line and 366 (148/0.44) on the outside edge  of the diagonal when using a pin hole of 0.44mm.

F284 x 1.414 = 401  so there is not even one stop difference between centre and outside ....in fact I guess that there is not even half a stop ( but I do not know how to calculate that, all I know is that a full stop increase by 1.414 the square root of 2  !!!


As some consider falloff to become perceptible when the corner illumination falls to more than 1 stop less than the centre, that is about 50% of the centre light level, so  I feel sure I am within that limit.

I hope you find that interesting ... and I hope I have it correct ...  well I shall also prove it empirically with photos !!

Thursday 22 December 2011

Another experimental shoot

Riverside at about 13:30 today I set up the camera with a new "lens" attachment for 115mm which I have calculated should provide no significant vignetting. A home made yellow filter was used. 


The result shows only the slightest amount of vignetting and certainly acceptable to my eyes, but no graduated neutral density filter used so the sky is washed out but it was mainly blue !!!


Same camera and same settings but camera just set much closer to the ship !!!

The 115mm pinhole focal length which is creating the 5" x 4"  paper negative is equivalent to about a 37mm when used with a film 35mm camera ( so information tells me ) and thus I shall now be constructing an  attachment to my camera back unit so that the yellow filter and the graduated neutral density filters can sit safely inside.


Tuesday 20 December 2011

Another visit to Rochester


I arrived in Rochester about 10:30 am and was lucky to find a car parking place available in the Castle Gardens car park.


This shot was taken from approximately the same place as on the previous visit to Rochester but this time using a new part to the pinhole camera having  a focal length or projection distance of 170mm, the pin hole was 0.5mm and there was a yellow filter and graduated neutral density filter used, exposure 5 minutes with f/ 340.


By moving back about 30 meters I used the same camera and set up and this is the result


By moving to a position adjacent to the car park this was the result  all camera and settings staying the same


Taken from within the Castle's Gardens looking towards to "old" Rochester Bridge, camera and all setting the same.


From the Castle's Gardens but this time looking up the River Medway, camera and setting the same.

So the calculation I considered to remove vignetting from the images and over exposed centre have worked ...  So what next ... well  how wide angle can I go before the overexposure in the centre of the image and vignetting becomes too noticeable. 

and just for a bit of fun 


Saturday 10 December 2011

An experimental shoot so the photo are all generally the same !!!

I arrived on site, Riverside Gillingham at about 10am and there was bright Winter sun giving a light meter reading of 1s at f22. This was translated to judge the exposures used in the photos. 

This time the photos I have scanned  the negatives in grey scale rather than colour (and then the colour removed).


Camera One:   3 minute exposure with yellow filter still evidence of the bright over  exposed centre


Camera One:   4 minute exposure with yellow filter
In my opinion slight general over exposure. 
Oops finger marks or something on the negative !!!


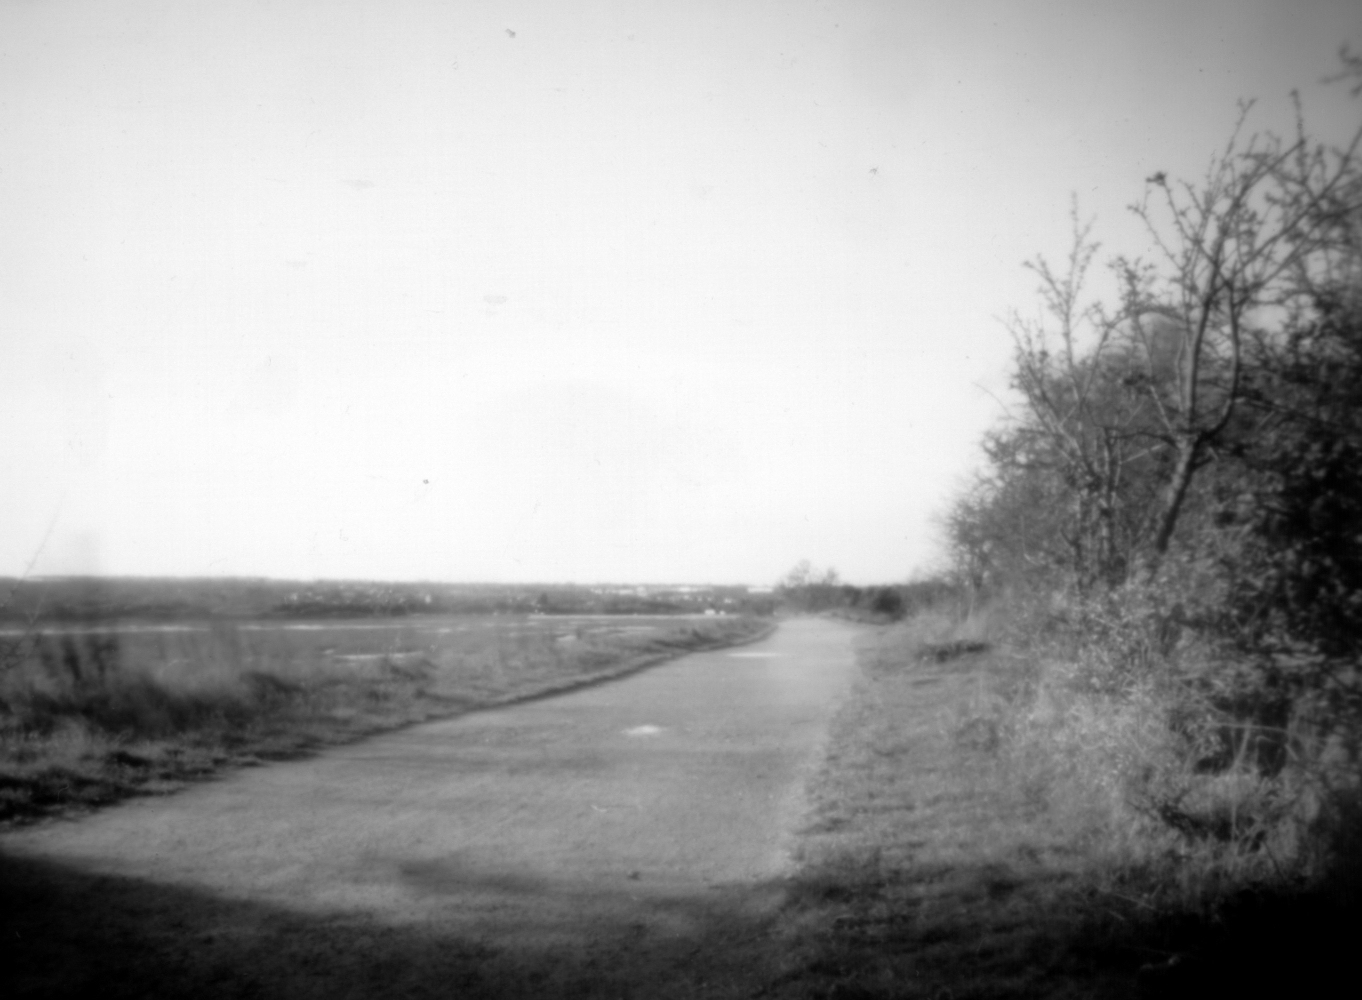
Camera One:   3 minute exposure with yellow filter but using a fresher paper
In my opinion less over exposure in the centre


Camera One:   4 minute exposure with yellow filter but using a fresher paper a general over exposure


Camera One:   6 minute  total exposure but carried out as a test strip with yellow filter but using a fresher paper. The strip suggest an exposure between 3 and 4 minutes.


Camera One:   one and half  minute exposure but with NO yellow filter but using a fresher paper. This show considerable over exposure due to Multigrade IV paper being very responsive to blue light.


Camera Two: with 120mm focal length and graduated neutral density filter and yellow filter 4 minute exposure

The over exposure at the centre has all by gone and the generally tonal quality is good overall.

The difference between the two cameras is the focal length and the filter systems but what a difference in results.

However from all that I have read having the centre area over exposed is a trait of pinhole photographs when using a flat negative plane as the light drop off from centre to edge is of the order of 0.5 to 1 stop due to the greater distance between the edge of the paper and the pin hole than between the centre and the pinhole. As the focal length is made longer the drop off is less as the difference in lengths is not as marked. 

I have made a re-design to my pin hole camera to test the idea that the greater focal length reduced vignetting.


Friday 9 December 2011

A walk near Rochester Castle

It was a nice bright sunny day so out I went to Rochester. I was lucky to find a space to park in the Castle garden small car park.


A 4 minute exposure with yellow filter.


A  4 minute exposure with yellow filter, taken standing outside the West door of the Cathedral

The streaks are from reflection of the sun off passing car windows.


A 4 minute exposure with yellow filter, taken in the lane leading to Minor Canon Row.


A 4 minute exposure with yellow filter, taken on the road leading from King's School  Boley Hill


A 4 minute exposure with yellow filter, taken from nearly outside Satis House.


A 4 minute exposure with yellow filter, of Rochester Bridge taken from outside the castle wall

A nice day out but now it seems that I have an over exposed centre of the photograph with this camera which I do not see in photographs taken with another pin hole camera. Still if it were easy to achieve perfection where would the fun be !


Thursday 8 December 2011

Vignetting test - a lesson learned


Concerned as to the vignetting in the last series of photos I decided to look closely at the camera and found to my horror that the opening made in front of the filter whilst the same size as that in front of the pin hole was not allowing the edge of the paper negative to "see the light".  A little bit of work with a file to make a cone shaped opening and below is the result.


This was a 2 hour exposure. There is not a hint of vignetting that I can see. The lack of contrast in the greys is due to the fact that I removed the yellow filter else the exposure would have been 4 hours !!! 

So in the last batch of photos it was mechanical vignetting which occurs when light beams from the object points which are located off the central axis are partially blocked by external objects in this case you could say an "improper lens hood". So nothing to do with the distance between paper negative and pinhole or anything else I might have thought that could cause the vignetting.

Wednesday 7 December 2011

A windy walk to Horrid Hill on the Medway

The plan was to be at Horrid Hill approach for high tide.


From the smoke from the power station's chimney stack you can imagine how strong the wind was blowing !!
This was a 6 minute exposure with Yellow and graduated ND filters using a home made pinhole camera with focal length of 120mm which equates approximately to a 39mm lens on a 35mm camera. 


The beached ship Waterloo

Different camera and a 4 minute exposure and shorter focal length lens and yellow filter only using a home made pinhole camera with focal length of 70mm which equates approximately to a 23mm lens on a 35mm camera.


On the East side of Horrid hill is this little beach.

A 4 minute exposure with yellow filter only. 


Here the camera has been moved nearer to the breakwater.

A 4 minute exposure with yellow filter only.


Closer still.

A 4 minute exposure with yellow filter only.


The other side of the breakwater.

A 4 minute exposure with yellow filter only.


The walk back. 

A planned  4 minute exposure with yellow filter only but the camera was blown sideways at 3 minutes!!!

I think that I am now obtaining consistent results and that I can go on photo shoots with confidence that I should have some satisfactory results.

The first picture was shot with my latest camera and is fairly even over all exposure and the other 6 with an earlier camera which seems to give brighter centre. This is pinhole camera vignetting and much more info is to be found here.


Tuesday 6 December 2011

a shoot in the back garden

I decided that today no more venturing out so why not try a couple of photos taken in the garden with the pinhole camera.


Featuring pots from  Whelans Factory Outlet Sheerness

There was a bright shaft of sun light with deep shade either side and the photo captures if exactly. 15 minutes exposure pinhole 0.4mm focal length 70mm and using a yellow filter but no ND graduated filter. 
The items in the foreground were about 3 feet from the camera


Same garden different direction The sun had moved round a turn of the camera about 20 degrees and another 15minute expose and again deep shadow at left and right edge of the picture.


Monday 5 December 2011

Moon shot

Well I have tried


Taken with a 1000mm lens using the timer delay. What I do not understand is why the image was sharper in the eye piece than was recorded on the digital camera ... Could it be the movement caused by the camera's  mirror !!