Wednesday 30 November 2011

Late afternoon shoot - ending just before dusk


Two hours before sunset,  a view to the Medway Bridge 
8 minute exposure


30 minutes  before dusk Riverside towards Power station
12 minute exposure


15 minutes before dusk Riverside looking up river
12 minute exposure

Atmospheric photos all taken with the pinhole cameras I have in very difficult conditions of cold and wind with each showing sky images. Each has a yellow filter and a light Graduated Neutral density filter.


Sadly much underexposed. The spikes on the gate in the foreground were just 30cms from the camera, the church several meters away ..

A very difficult subject due to the high contrast between black of shade and white of sun light ... maybe a wrong subject but interesting result all the same ..


Thursday 24 November 2011

A trip out to Edith May

UPDATE:
The owners of the Edith May liked the framed printed copies of the first two images below and are to put them on display very soon - now that is great news and spurs me on to do more pinhole camera work.


We set off for the Edith May in bright sunshine as both I and my wife were doing photo shoots she digital and I pinhole.


The sun stayed out and resulted in exposures of 6 minutes for the pinhole camera and goodness know what for the digital camera. 


To ensure I was putting the photographic paper in the pin hole camera the right way round I decided to trim off the top right hand corner with the emulsion facing away from me. When changing the paper negatives on this shoot it was much easier to check than without the cut off.


The Edith May - Lower Halstow

Well I think, but some may not, that this is a fabulous pinhole camera exposure as at long last I even have a sky which of course changes over the 6 minute exposure. The blurred image on the rear mast is their pennant's that they have flying for winning two barge races.


The Edith May and Halstow Church

Similar exposure and much better than a similar photo taken a few days ago and also on this blog.


The creek leading to where Edith May is located.

Foreground , back ground and sky shown in this 6 minute exposure using a yellow filter and also the graduated Neutral density filter within the pinhole camera.

Ok, so there is still a little bit of dust on the filters but much improved.


This is the negative as developed and but the orientation have been turned through 180 degrees from that the camera would have seen but there  with no other processing at all. 

I hope you can see:-
  1. The corner removed bottom right which when in the camera is top right!!!
  2. The wide range of tonal information that is now achieved with Ilford Multigrade VI paper using a yellow Cokin filter
  3. The clouds now in the photo due to the use of the graduated neutral density filter.
A second identical pinhole camera is now being made so that I can take a photo with one and be loading the other ...


Wednesday 23 November 2011

A trip to Chatham Historic Dockyard

The afternoon looked bright so at 12:30 I made my way to CHD. The the clouds came in.

This is what happens if the lid is not fully secured when being removed from the changing bag. But what is has shown is that may be I should pre-flash the paper to reduce the contrast. I have read about this but here I see the dark areas are not as dark where the flash occurred and there is still an image. Some experimentation required.


I went over to the railway trucks but with no sun shining and a 12 minute exposure the is do detail in the dark areas.


Walking a short distance from where the previous shot was taken is the Ropery. Again no sun and 12 minute exposure.


This was quite an experiment as there were seagulls flying around and landing on the timbers just in front of the camera but no effect to the image at all. The tide was going out but even that has not spoilt the photo nor the slight movement of the floating boats.


This amazing building showing so much movement since construction just had to be one of the photos even thought the light was now indicating a 24minute exposure so no detail in the dark areas but interesting if only for the moving branches in the foreground.


All the photos had the yellow filter and the graduated filter in place.

Sorry about the dust on the filters which showed up much more than I would have expected.

So what have I learned from the afternoon.

1. For pinhole exposure one does need sun light
2. Make sure filters are clear of dust particles
3. Have a second pinhole camera ready to take the next shot whilst preparing the other camera.
4. Have two "different" boxes in the changing bag, one for the exposed negatives and one for the unexposed
5. Check that you are putting the paper negative in with the sensitive side towards the lens else NOT IMAGE. I think I will nick of the top right hand corner of the paper so that it indicate the correct way round.
6. Always take photos as one may have  unexpected results.

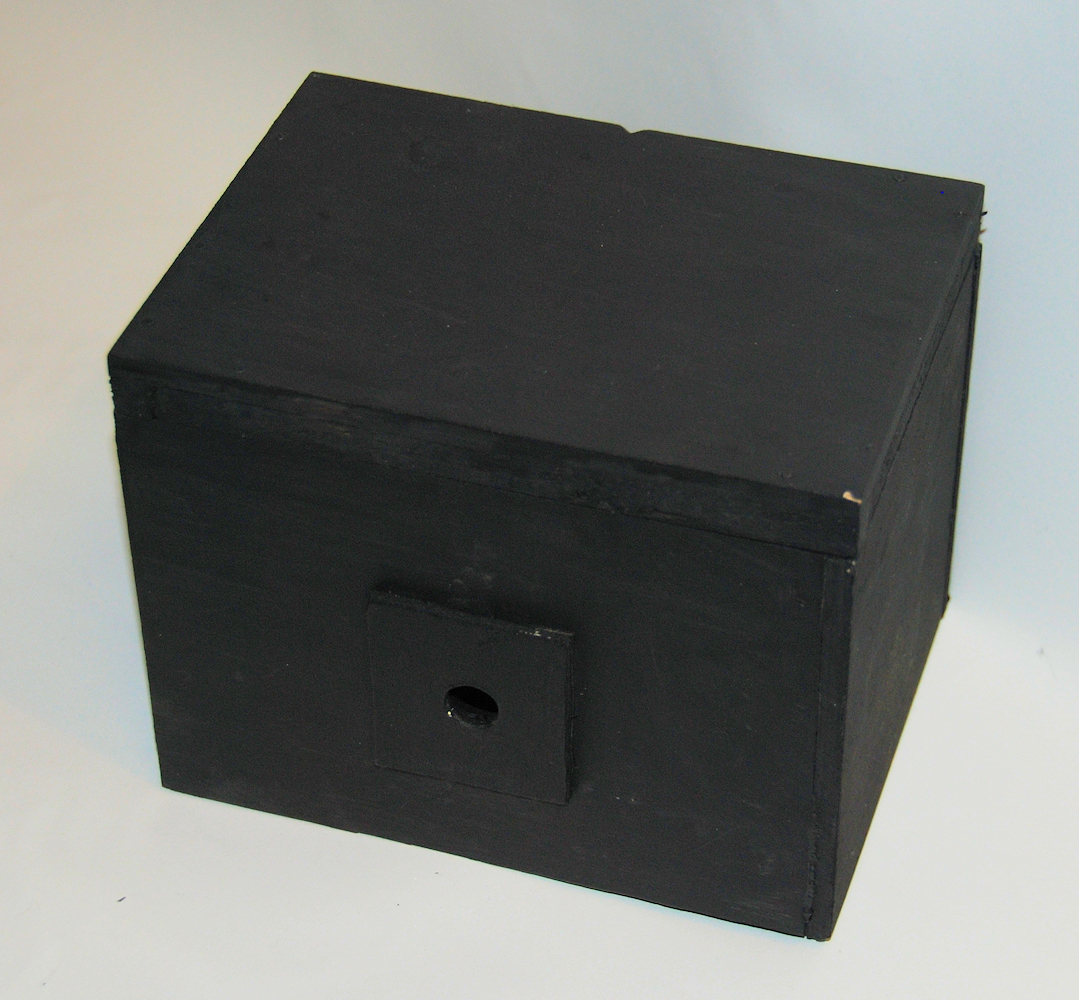
Finally all in all the camera worked as designed and could be loaded and unloaded easily in the changing bag.


First image from the new pinhole camera

This is the first image from the new pinhole camera.


This was a 6 minute exposure onto Ilford Multigrade VI paper negative, with a Cokin Yellow and Cokin Graduated Neutral density filter.


Image of a pinhole camera's pinhole !!

Tuesday evening I visited a friend who has a microscope that attached to his computer. Using 400x magnification  he was able to acquire this image of the 0.5mm diameter pinhole.


As you can see the hole is round and the little flecks at the edge are we believe dust particles and are so small they cannot be seen with the naked eye !! This "lens" is to be used in the new Pinhole camera.

Bushnell Spacemaster Telescope

Many years ago I was given by my father in law a Bushnell telescope  complete with a variable camera mount. I have just been able to order the camera body mount that can attach to that telescope mount.


If it all works out well I will have the equivalent of a 1500mm lens ( info from the instruction )  but all the exposure will have to be done manually. Cost of the part £10 So I could have a tripod mounted big lens ...


So we will be taking a leap from pinhole to long telephoto..  Watch this space for more info.

Tuesday 22 November 2011

On a foggy day

Not the right conditions to go and take pinhole photos with the home made pinhole camera and paper negatives so the Nikon D80 with a pinhole in the body cap  was put into the service - on a tripod of course.


The size of the pin hole is unknown  the exposure was 6 seconds ISO 250


An interesting close up shot similar exposure as the shot above.


What amazing depth of field the sign was less than 1m from the camera

Not too bad for a foggy day which does not help with the sharpness of the image


And this one just because one can do colour digital pin hole images much more easily than colour paper negatives !!!


Monday 21 November 2011

Another new design of PINHOLE camera

The 5x4" black backs are fine when one has a dark room to be able to change the paper negatives but not practical in the field.
So I have designed a box camera with a lid that lifts out of the camera, the yellow filter is inside the camera and it has screw mount for a tripod.


The ability to lift the lid of the box in a changing bag and put in a new paper negative will mean I am only limited to the number of sheet of paper I take with me.
The camera has a fixed focal length 120mm, pinhole size 0.4mm and it will take 5x4 paper, the width is about 165mm and height about 120mm.


I am very excited having created this camera as I have designed it from my experience of my other two home made pin hole cameras.
The green filter holder is enclosing the Yellow filter 101 from Lee filter which is normally used to colour stage lights and in front of that is another filter holder which can hold two Cokin Filters and be used at the same time as the yellow filter. At present the filter holder is un-painted so that you can actually see it as I am using a matt black eggshell paint and it has made taking photos to show you the camera rather difficult.

The paper negative holder is at the rear with one of my early negatives taken without the yellow filter.


So this is the camera with the green filter holder in place and there is a reflection on it making it look like two filter holder one behind each other but there is only one and the brass fitting is the tripod fixing.

A shutter will be provided at the front so that when loaded with a paper negative the exposure will not commence until the shutter is opened.

So what makes this camera so different:-

1. The filters are inside the light tight box.
2. I can have the yellow filter and two further filters e.g. a graduated neutral density filter and one other if I wish.
3. The paper negatives can be easily loaded and unloaded in a changing bag.
4. There is a notch at the rear of the lid so that I know the orientation
5. There is a pocket externally at the front for the pin hole which is yet to be made from a "Diet Coke" Can

The shutter is made and painted and the filter holder also painted 0.4mm and 0.5mm pinholes made this time by using micro drills so the camera is ready for use.


Sunday 20 November 2011

A walk along the beach at Upnor

With great afternoon sunshine I took a trip to Upnor beach on the River Medway.


This is the scene I spotted and this must be the best photo from the pinhole camera yet.
The exposure meter for ISO 4 gave 1s at f16 which converted to pin hole exposure gave 5 minutes allowing for the yellow filter.  Near perfect in my opinion.


Moving closer to the timber and chain ISO 4 gave f22 thus a 3min exposure allowing for the yellow filter.


Another view of the same subject at similar exposure


This is what can happen if the ground moves. There was obviously imperceptible movement in the ground or was it just me not standing still- you can see my shadow left third of picture.

The yellow filter I am using thus give a -1 stop so exposure times need to be are doubled.  


Another new design of PINHOLE camera

See later post for details of the new camera.

Saturday 19 November 2011

Another trip out


I am still using the yellow filter ...


Well I have tried very hard to stand still for 4 minutes ..  The boat managed it but I obviously moved a little 


A view to the power station using the 150mm focal length pinhole lens


Another view but using the 70mm focal length lens. There is slight vignetting top right.  


Edith May in Lower Halstow


St Peter's Church Bredhurst  - great depth of filed but lacking detail in the trees 


Each section represents an exposure of 30 seconds. Even after 3 minutes the exposure is too little as I have had to lighten the image in digital processing.


I am of the opinion that the exposures all need to be a little longer as I am not taking account of the absorption of the yellow filter.

If there is more sun shine I will try again with longer exposure ...


Thursday 17 November 2011

A visit to Chatham Historic Dockyard

All the photos were taken with a Yellow filter which had been cut from a light filter pack by Lee Filters. Yellow 101. This filter allows 80% light transmission and general restricts the light from the blue part of the spectrum and thus tames the contrast  of Ilford Multi grade paper which I am using as negatives. The developer was standard for the paper but the dilution was 1:18 rather than the normal 1:9.

I think the results are quite promising.


This photo was taken at about 13:45 and the sun had not come out and it was generally grey hence the foreground is rather black as the camera was shooting into the light rather than from it. 


At last we have some tones in the sky and there was sunlight for this picture which has an exposure of 3 minutes.


Whilst the close up item of the first picture was not perfect this image shows the amazing depth of filed of the pinhole camera.  Photo taken in afternoon  sun light.


You can see the flags were moving !!!


Again this shows the great depth of field


Even a clear blue sky is not blackened in this photo ...  I does look as if some of the photos have blackening in the corners due to the pin hole not quite giving full coverage of the negative so I will try next time to crop the photos a bit better ...


Tuesday 15 November 2011

Pinhole camera with a yellow filter

To try and enhance the depth of the contrast and not make it so severe I chose to put an 80Y yellow filter from a colour printing filter pack in front of the pinhole.


This is the amazing result. I did UNDER expose slightly so the negative image was not dark enough so the positive image has been lightened but only slightly - that is me being fully honest !!!


The sky was clear blue ....


I think this is my best image to date ...

Monday 14 November 2011

Pinhole camera v 35mm Film camera

It is very difficult to understand the DSLR and its lens sizes but easier to understand the 35mm film negative size and to be able to compare it with the 5 x 4 " paper negatives I am using.


I am not going to bore you with maths but suffice to say that my 150mm lens is about equivalent to the "standard" 50mm 35mm SLR lens. In actual fact from drawing out to scale the lines needed to compare I have arrived at a figure of a focal length of about 178mm between pin hole and film surface so near enough 150mm


I have also worked out that if I take a photo as a portrait of myself then using the wide angle lens 70mm equivalent of a 23mm 35mm film lens that a distance to the camera of about 500m should be about right.


So an indoor photo shoot is on the cards for tomorrow.

Some digital camera pictures taken on Sunday 13th Nov 11


The end of the day


Not a ship in a bottle but a ship through a rudder opening !!


An early morning sun shine shot taken about 09:00


The power station that could be heard in the stillness of the morning


Such fine work !!!

Sunday 13 November 2011

Early start today

The goal was to arrive on site for photos at 08:00. I was there but site did not open until 08:30.


These are the Pinhole Camera shots taken this morning and certainly in my opinion are typical of the quality of pinhole cameras. 


They were processed in diluted developer 1:18 and then washed and fixed in usual way.


5 from 6 are reasonable but I now think that using Multigrade paper is not right - fine for printing B&W negatives but not to create a negative.


The picture were scanned at 400 dpi, mirror image flip, converted to positive and lastly converted to grey scale. No other adjustments have been made.


This was actually the last photo taken today and shows the longer exposure giving better tonal quality.


I pushed the exposure to a maximum reading and the benefit show in better tonal quality


I do not know quite what happened to the sky in this one but one can just make out the barges in the distance.

------------------------------------------

I have now ordered some Ilfospeed RC 8x10" Gr.2 PEARL and some Ilford PQ Universal paper developer which by all accounts I have read should give better results in the pinhole camera.